
Although I enjoy celebrating the Chinese holidays and putting up Chinese decorations, I also miss the Western themes I've always known. I've never been big on Halloween decor, but, I do love fall! I looked around online for something I knew I could get the supplies for, and decided to make some ribbon wreaths. All my supplies were purchased from Taobao, the Chinese equivalent to Ebay. If you search for "ribbon wreath" online or on Pinterest, you can see many more color themes. I had a friend, who is not used to DIY projects, make a wreath with me and she did fine. I think it is a good project for someone new to DIY projects. It took 4-5 hours of work time while we chatted.
I suggest reading through ALL of the directions before beginning, even before purchasing your supplies!
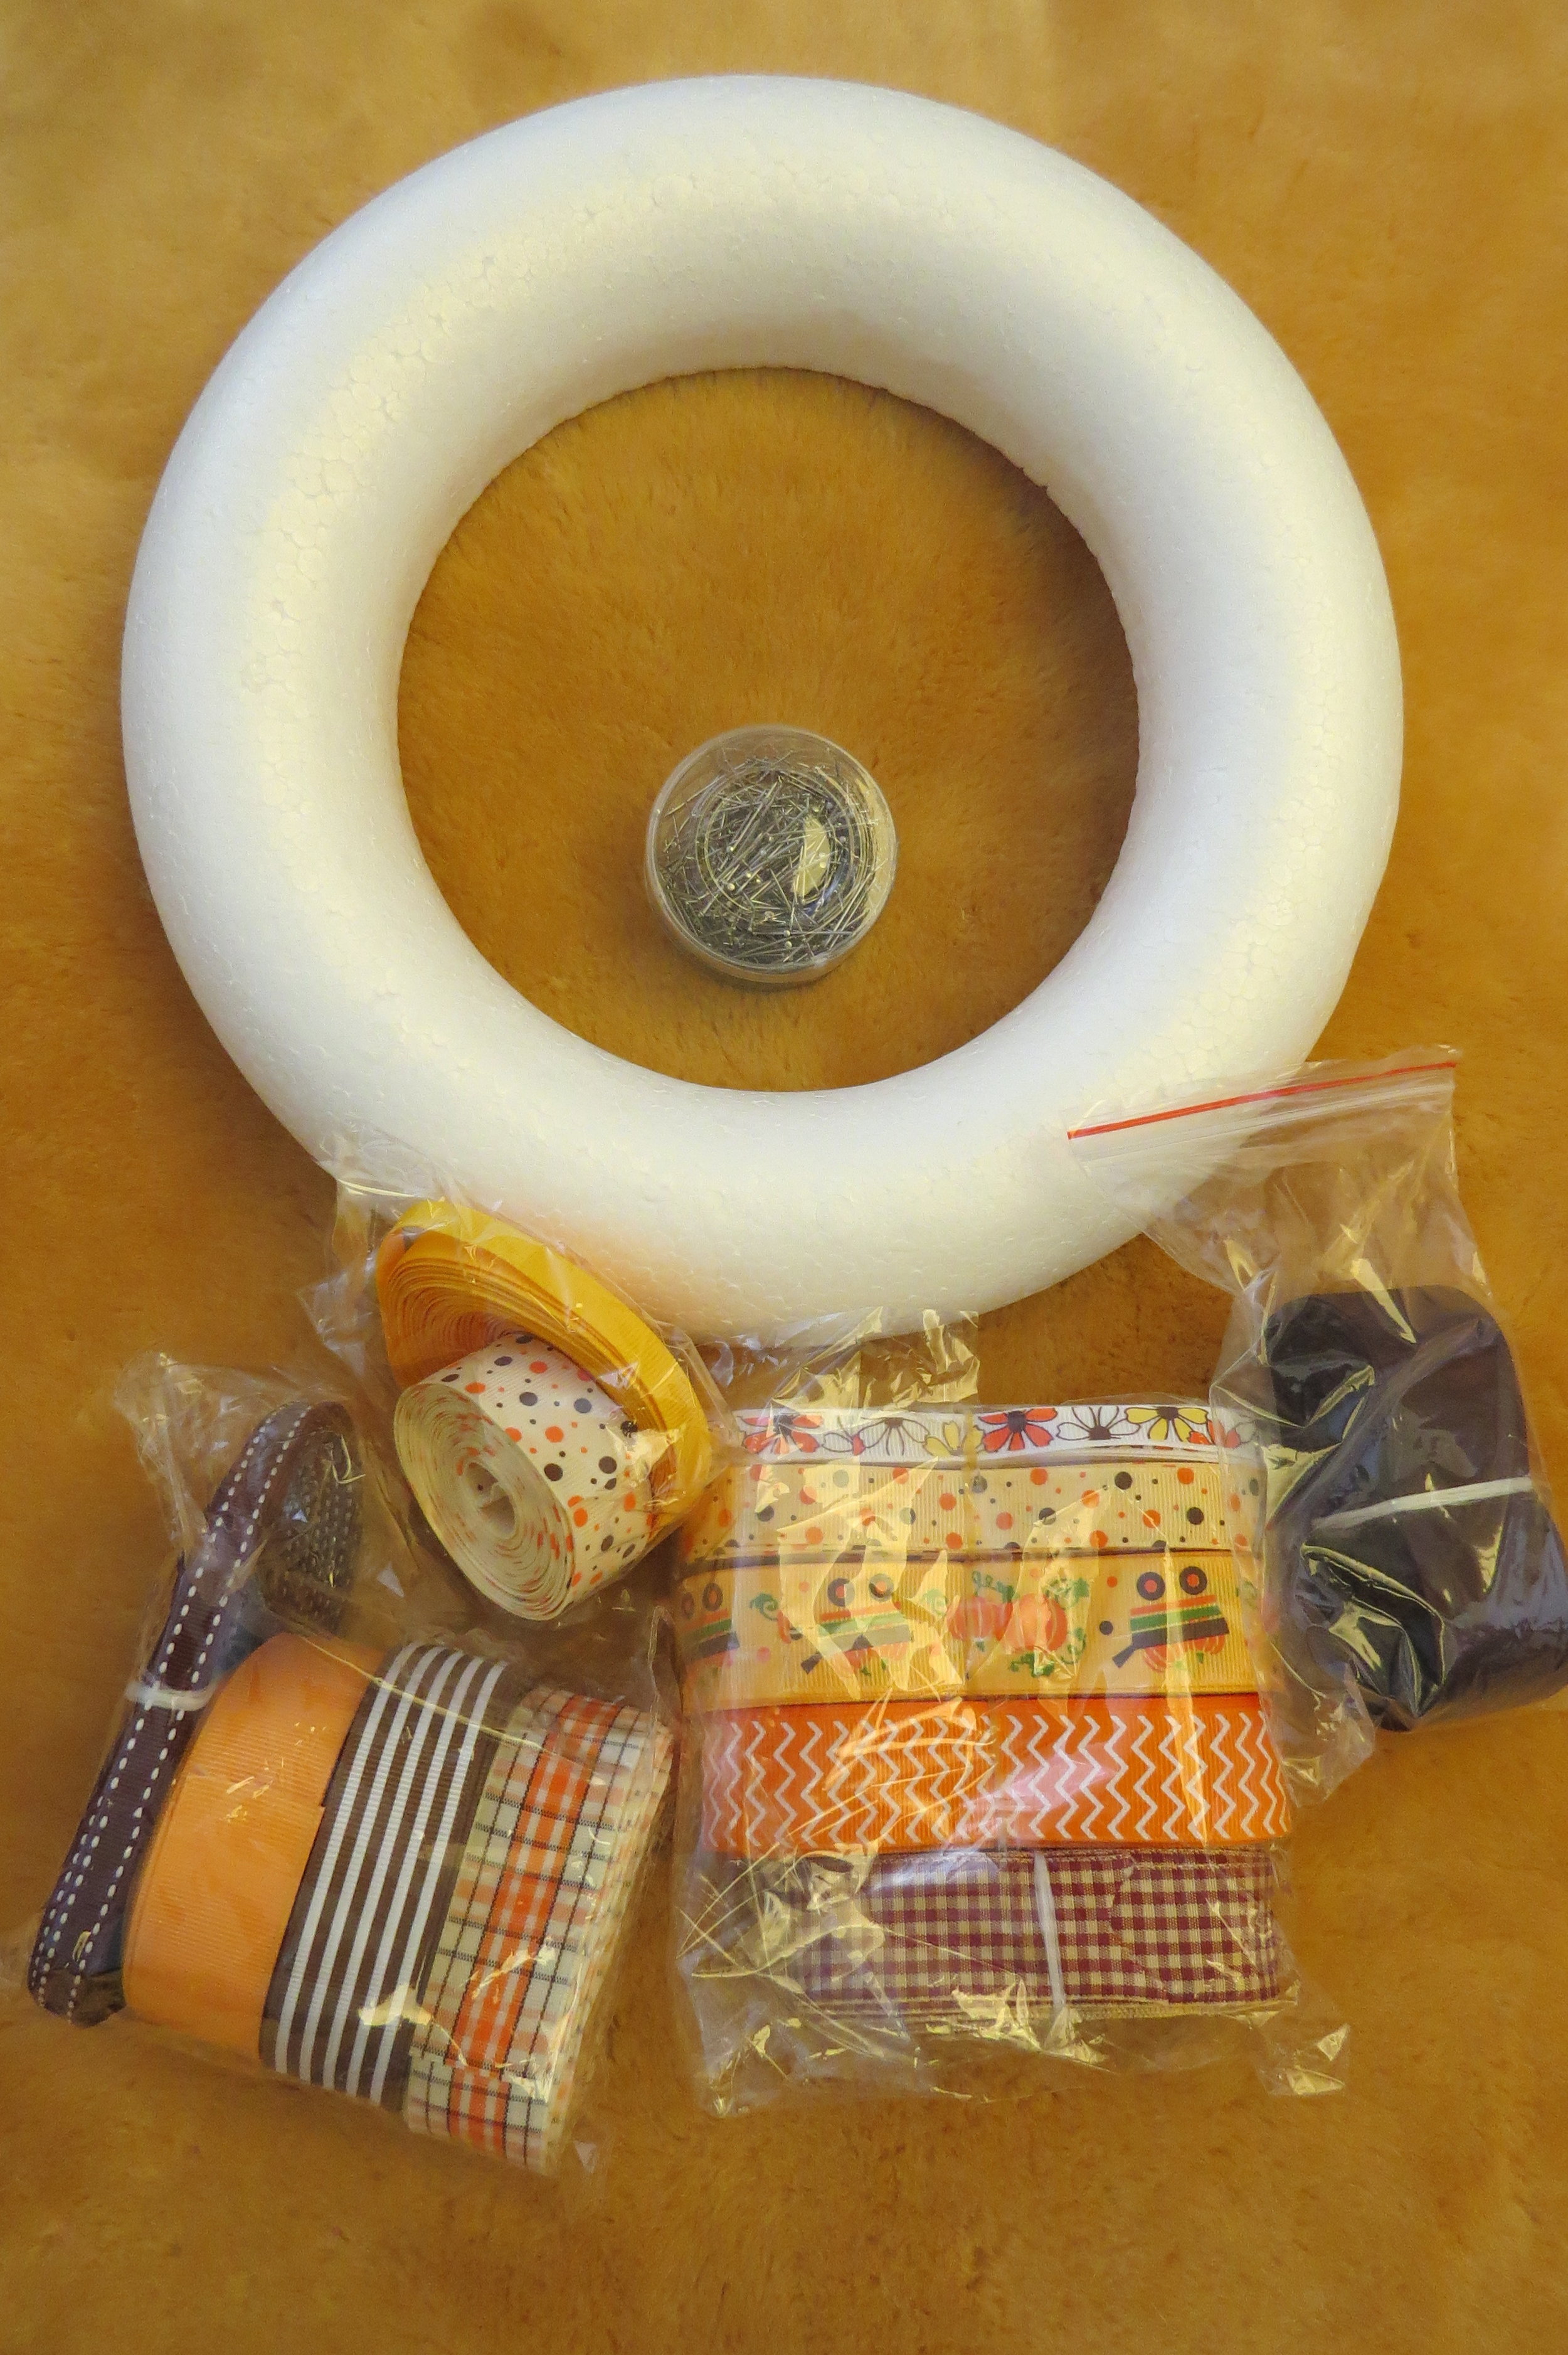
The supplies you need are:
1 styrofoam wreath - mine was 30cm/12 inch, it is flat on the back
5 meters/5 1/2 yards of wide ribbon (approx 4cm/ 1 1/2 inch) to wrap the wreath base
2 1/2 meters/2 3/4 yds each of 12 different ribbons of varying widths
straight pins (400-500 pins)
ruler or tape measure
scissors
Optional:
An ornament or keychain, etc. to hang in the center of your wreath
A thimble is helpful!
Choose one of your ribbons that is between 1-1 1/2cm/1/4-3/4 inches wide and cut a 28cm/11 inch piece to use for the hanging loop. For the rest of that piece, and the other ribbons, cut them into pieces 7 1/2cm/3 inch long. You can start with about 25 pieces of each different ribbon and see at the end if you need more. This will vary depending on the widths of the ribbons you have chosen.

Start by pinning down one end (on the back of the base) of the ribbon you've chosen to wrap your styrofoam base with. Start wrapping tightly around the wreath, pinning on the back every 3rd or 4th wrap. As you see in the picture, on the inner part of the wreath, the ribbon will be overlapped more than on the outer edge. Continue around until the base is completely covered, the cut the ribbon and pin down the end. I made two wreaths, one had a solid brown ribbon on the base, on the other, I used two different patterned pieces. This ribbon does NOT show through on the front once all of the loops are pinned on, you only see it on the back.
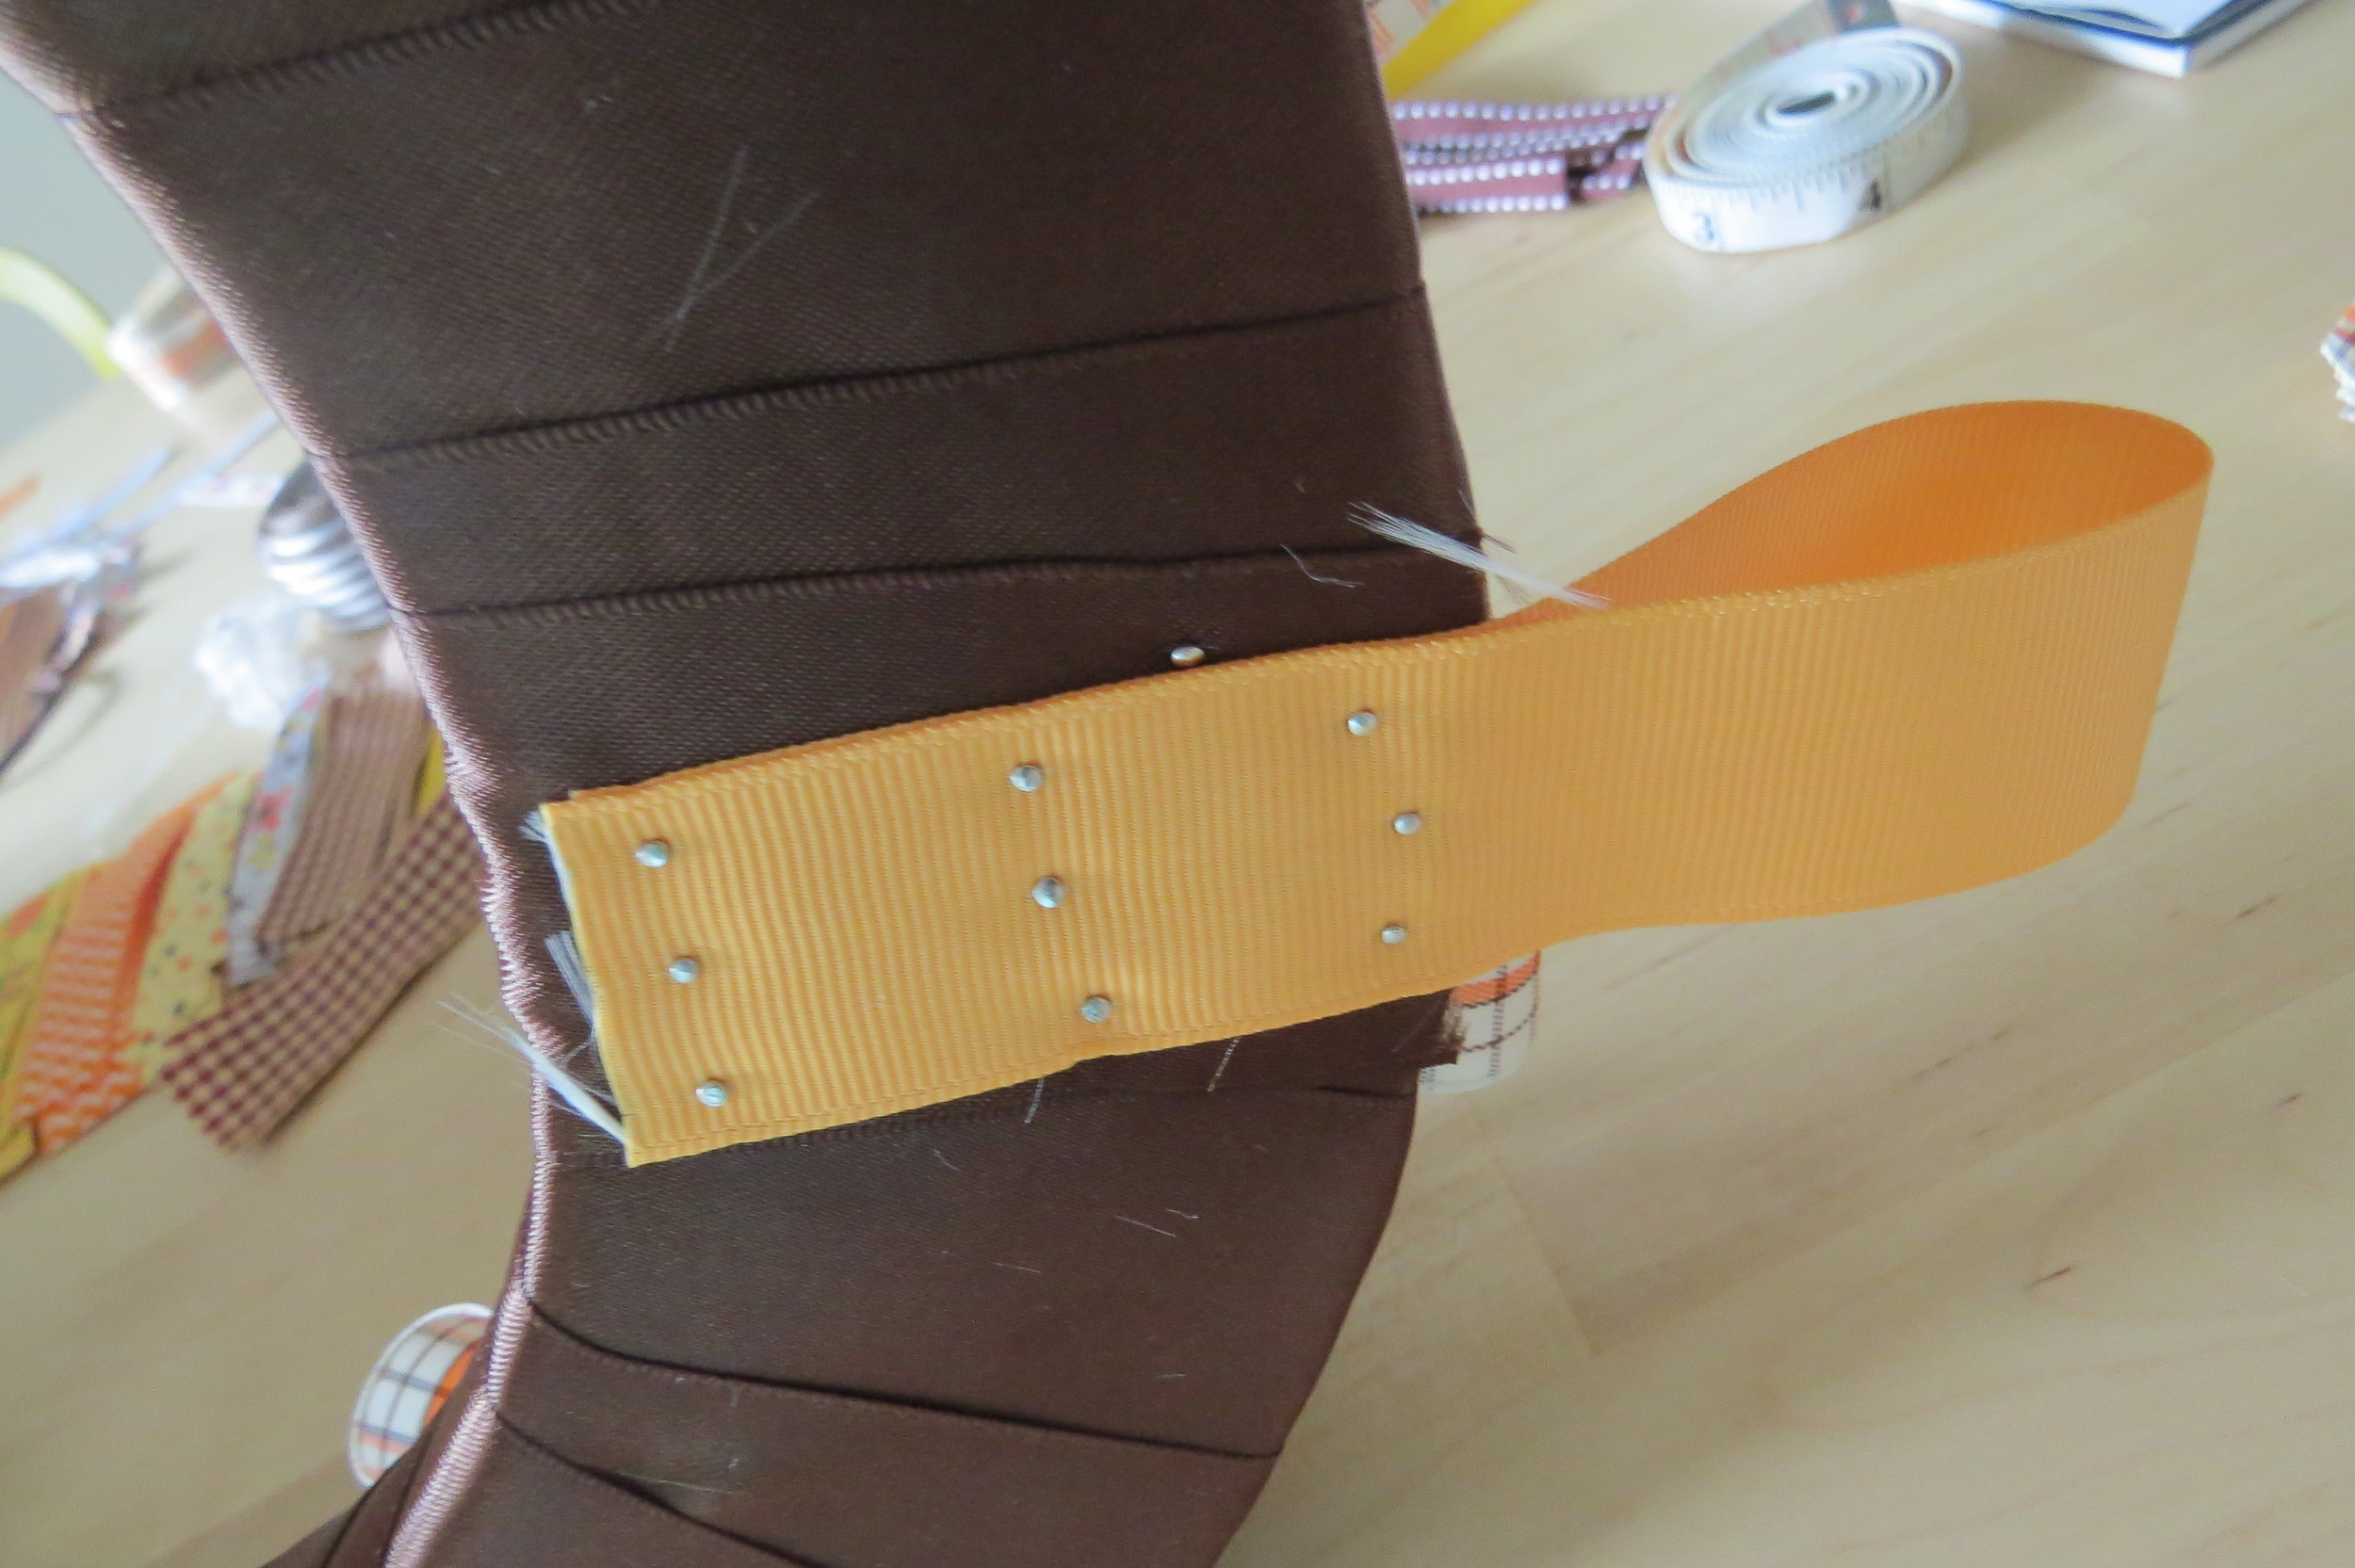
Fold in half the ribbon piece you cut for the hanging loop and pin it onto the back side as shown. You will understand here why the thimble comes in handy, depending on your ribbons and pins, it can be difficult to pin through all of the layers!

Starting with your widest ribbon, from one cut piece, form a loop, overlapping about 1 1/2cm/1/2 inch of the ribbon, position the loop on the wreath and pin it through the center. Repeat this, spreading out your ribbon loops around the wreath, making sure to put some on the inner and outer edges as well as in the middle. Do all except for 2 or 3 pieces, saving these to use for filling in at the end.
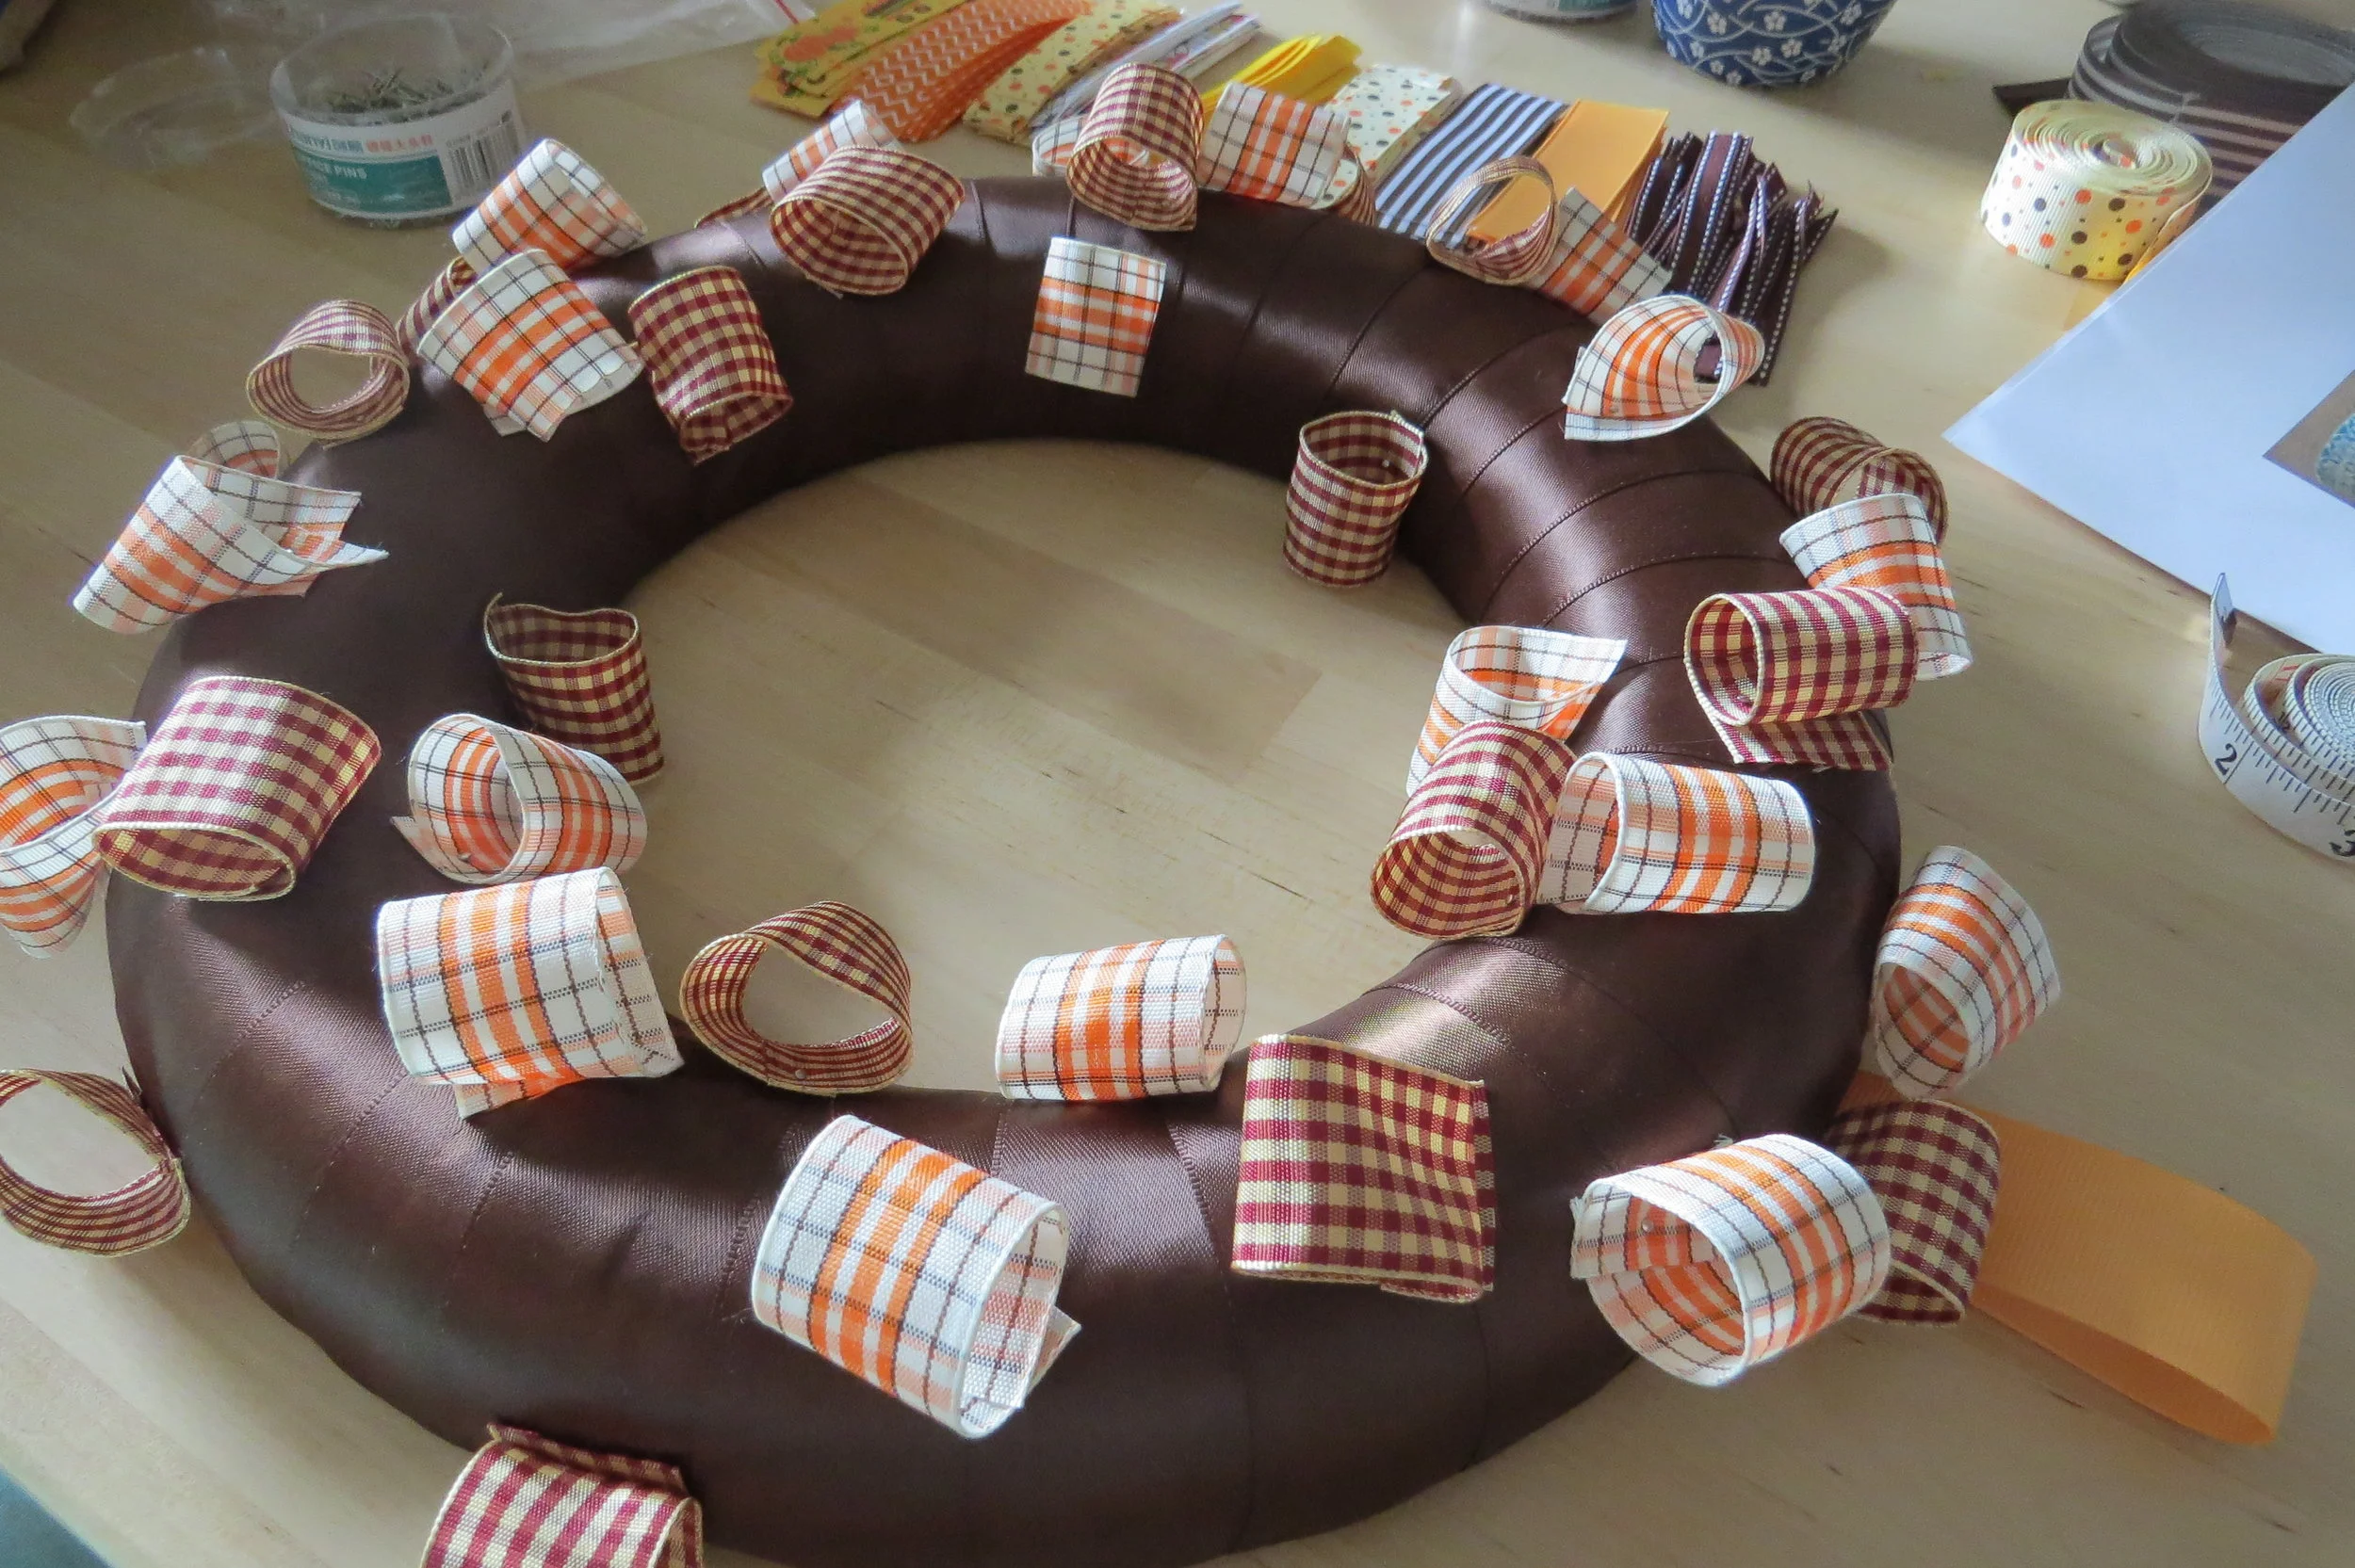
Continue with the next ribbon. Vary the angles of how you pin the loops down. If they start to twist, don't worry, you can pin them down better at the end.
Continue adding ribbon loops to your wreath, remembering to work with the widest ribbons first.

Continue adding loops, filling in the most open areas and spacing out each ribbon type. Try to avoid putting two of the same pattern right next to each other.
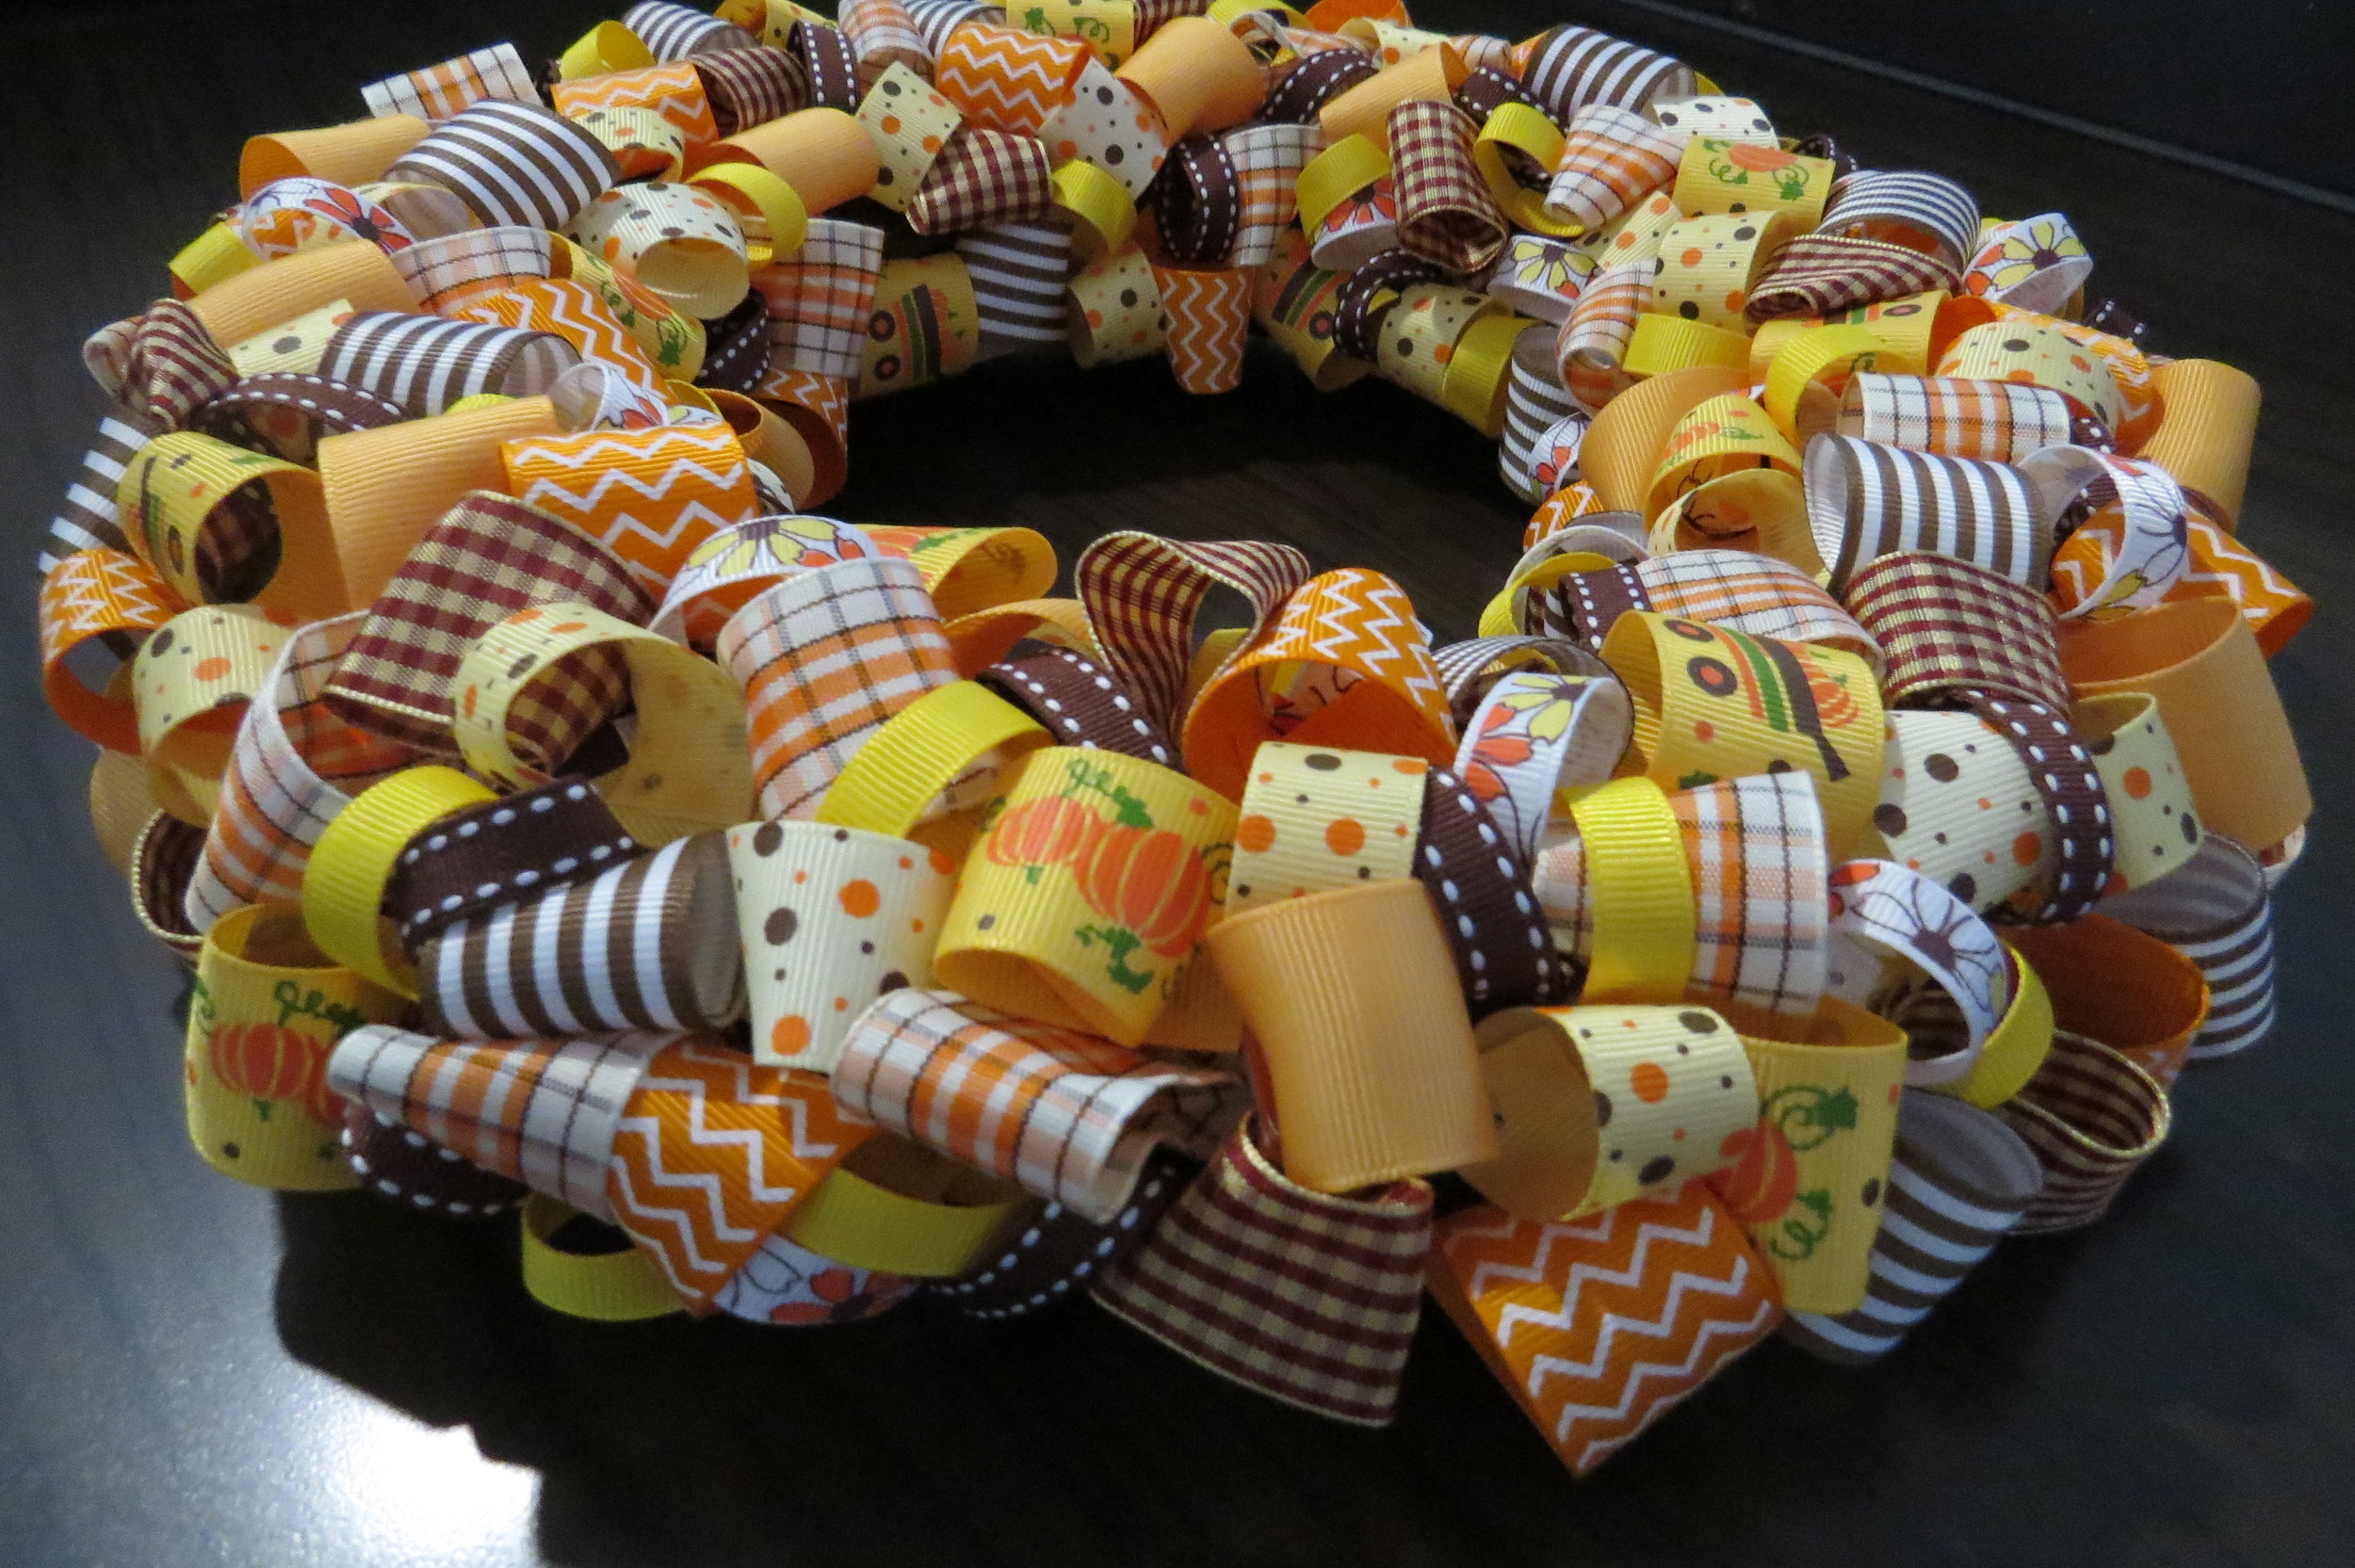
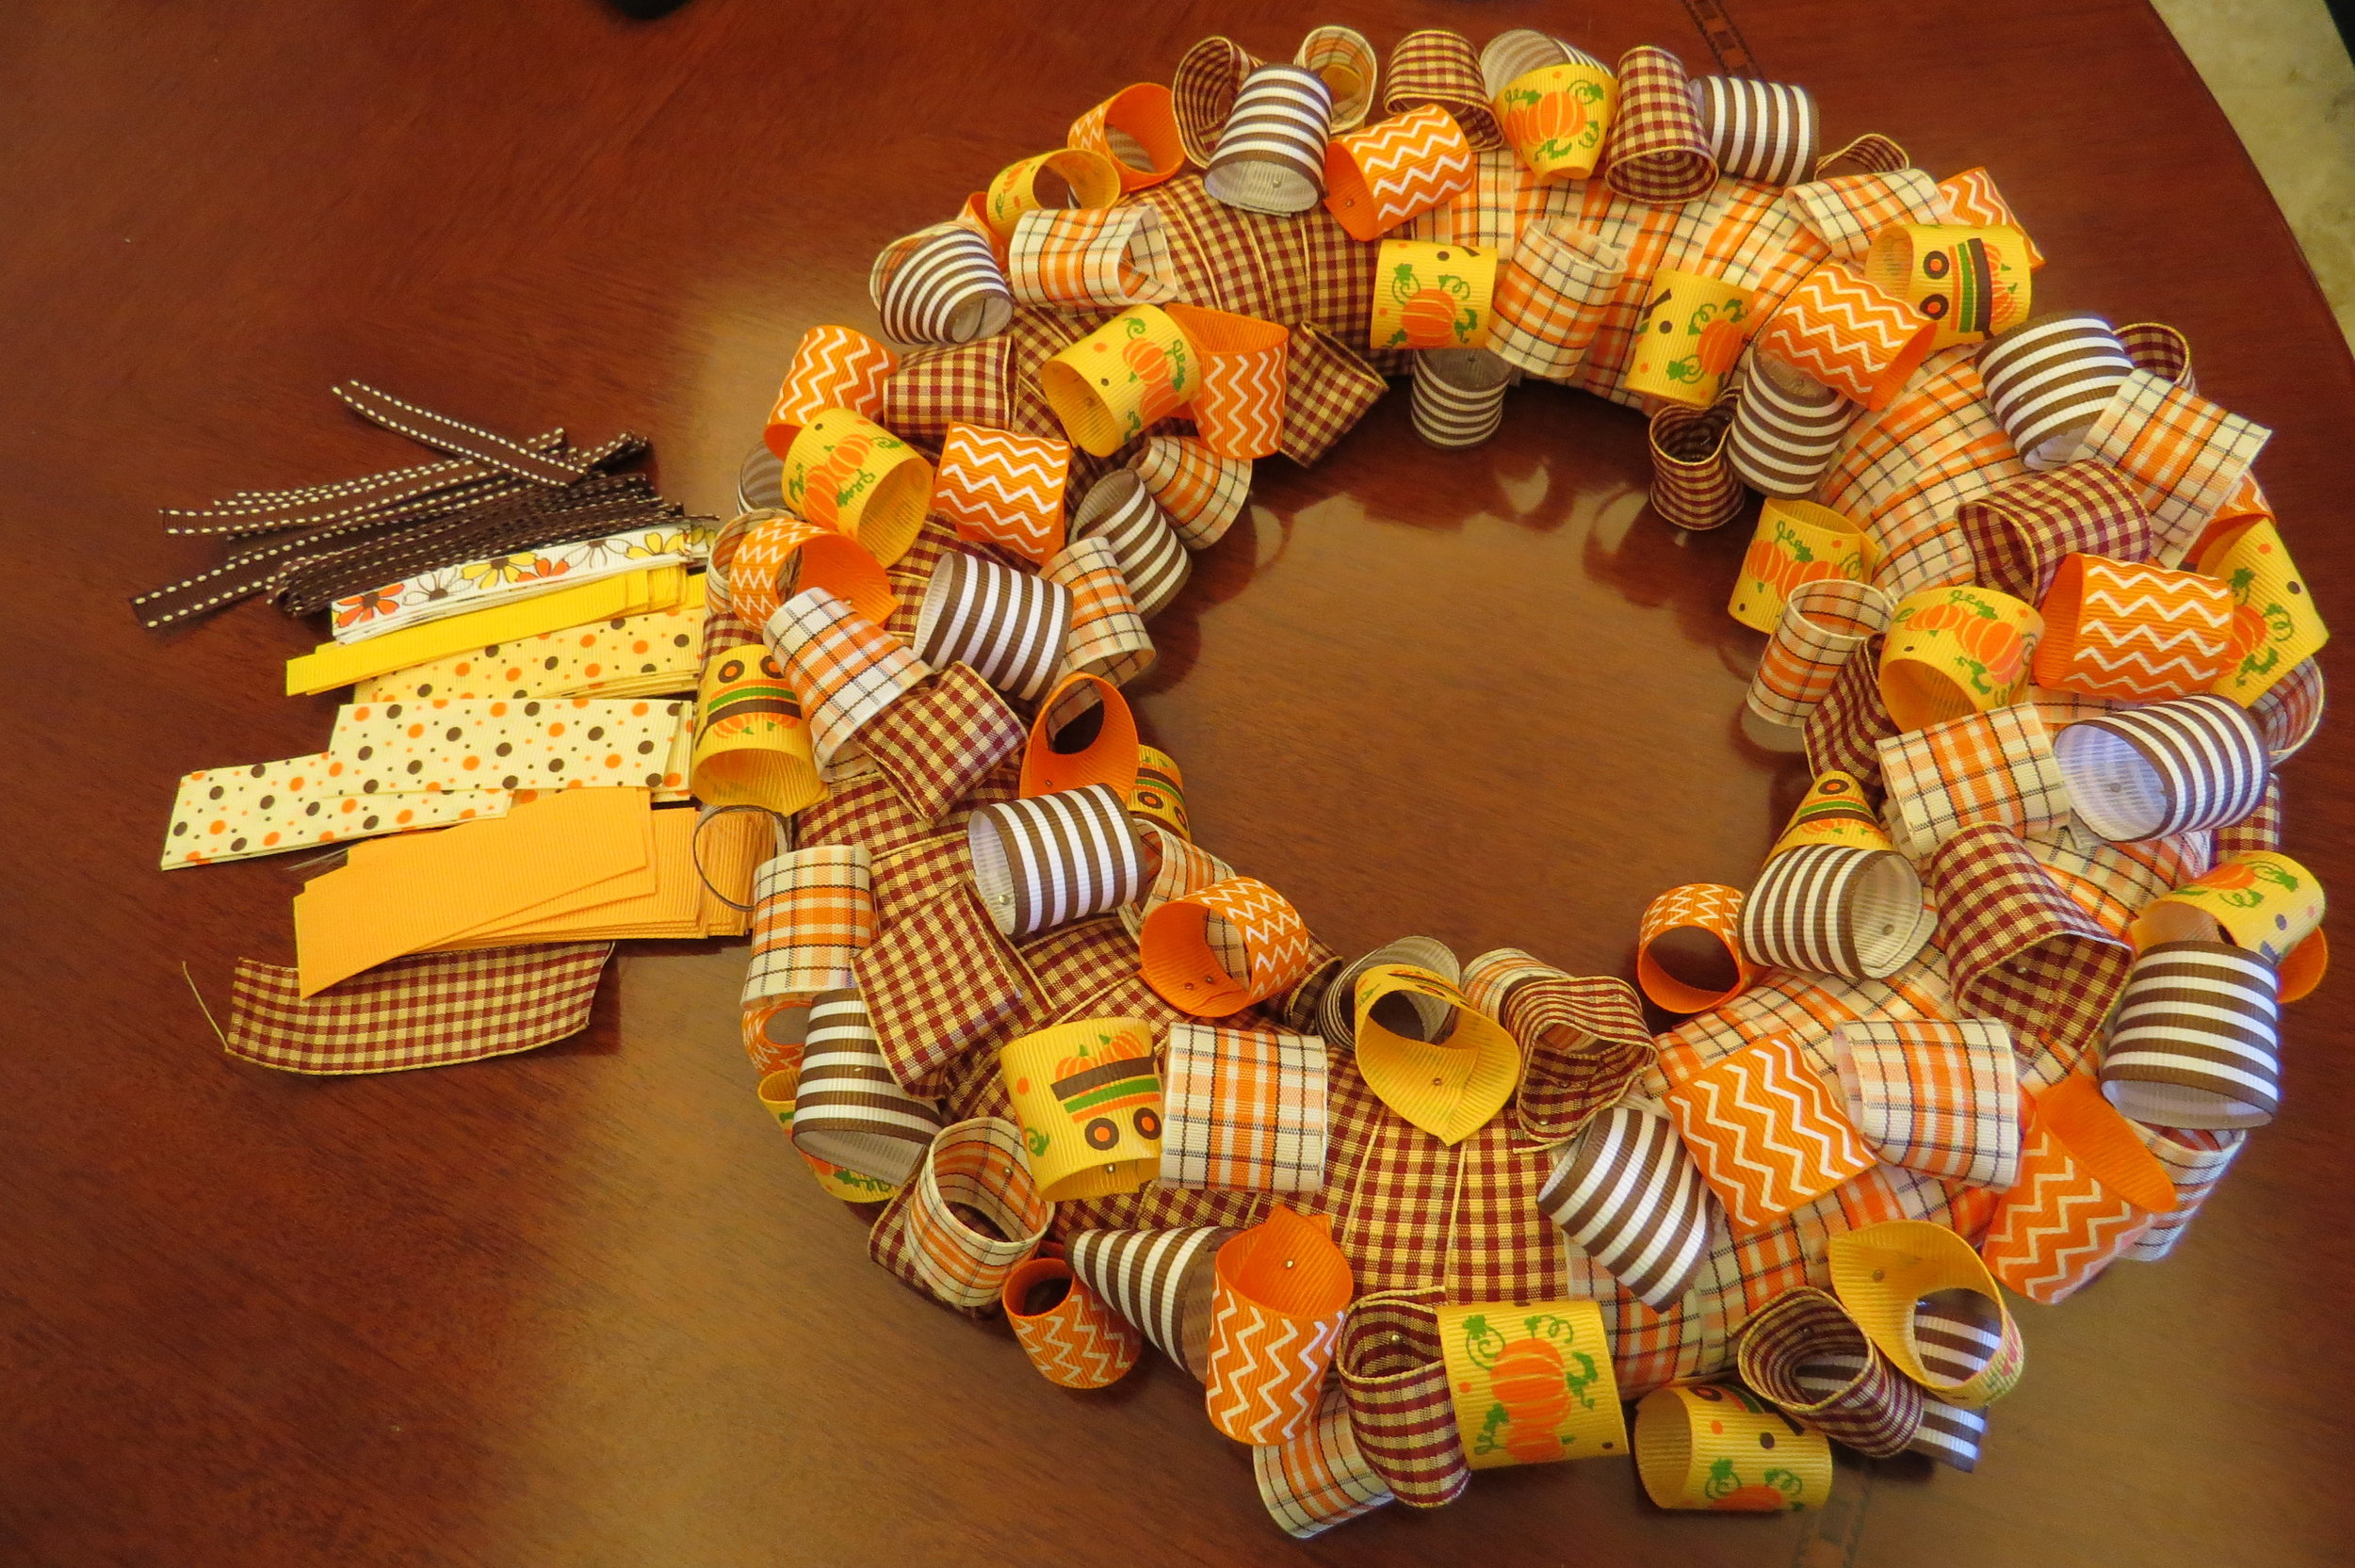
When you have finished using all of the ribbon types, use the remaining two or three pieces of each type of ribbon, which you have saved, and go back and fill in any remaining spaces. If needed, cut more ribbon pieces with what you have left. After I had pinned all of my cut pieces, I would cut one at a time, choosing the best ribbon to fill in the few last empty spaces. If needed, add a second pin to some of your loops to hold them in the correct position. They can be turned to best fill in their space on the wreath.

You can see how the ribbon loops go completely to the edges on the inside and outside of the wreath. (This picture shows the wreath where I used two different ribbons to cover my styrofoam base )

This can be the finished product if you are happy with it!

You can also add an ornament to the center of the wreath. This ornament I chose was actually a keychain. Just shop around for something you are able to hang, making sure it isn't too heavy. For my bird, I added a ribbon loop in order to center it in the opening, and pinned the ribbon on the back. Hang your wreath and enjoy! Or give as a gift :-)